Installing new flooring is one of the most exciting ways to refresh your home’s look and feel. But let’s be honest—getting there can feel a little daunting. You may already be wondering: Where do I start? How much prep is really needed? What if I forget something?
These concerns are completely normal. In fact, proper preparation is one of the most overlooked parts of flooring installation. Skipping key steps can lead to delays, unexpected costs, and even post-installation issues. The good news? With a little guidance, you can avoid all that stress and set the stage for a smooth, successful installation.
In this guide, we’ll walk you through the entire new flooring installation preparation process step by step. Let’s dive in and make sure your home is perfectly prepared for its flooring makeover!
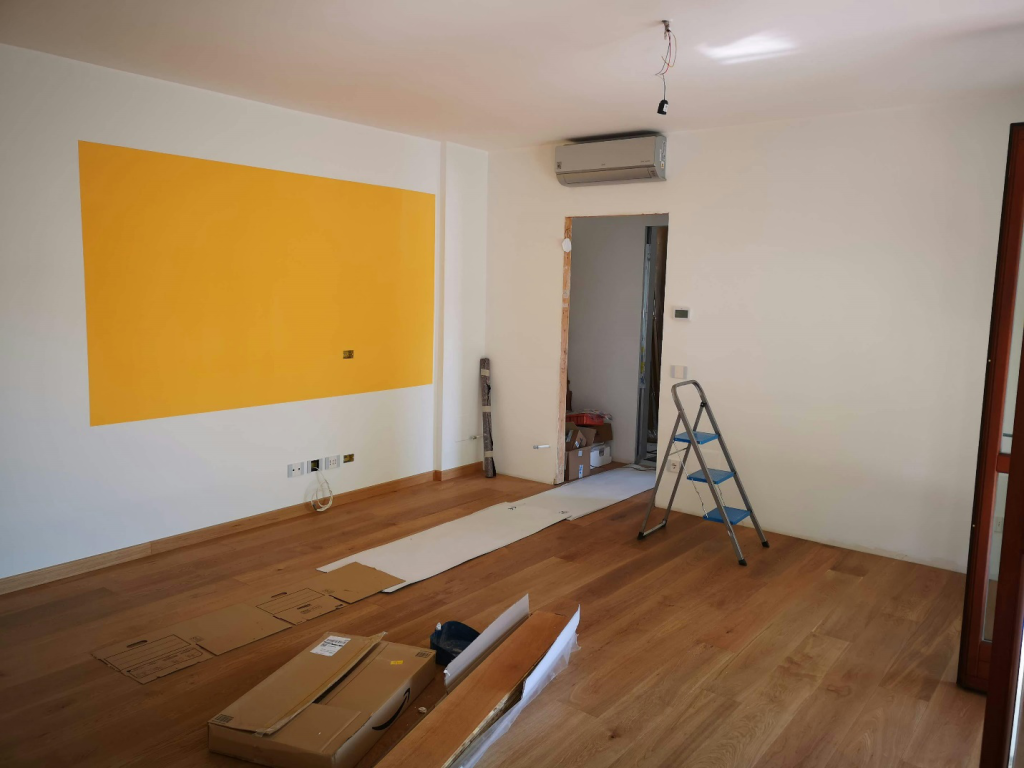
Decluttering and Clearing the Installation Area
Step 1: Remove Small Items and Breakables
Start by removing anything that’s fragile or small enough to be misplaced, such as:
- Picture frames, lamps, and vases
- Books, electronics, and knick-knacks
- Rugs, curtains, and decorative items
Step 2: Move Furniture Out of the Room
The next step is clearing out larger items, such as sofas, beds, tables, and cabinets. If your home has limited storage space, consider these alternatives:
- Temporary Storage: Use a garage, basement, or guest room.
- Furniture Lifts or Sliders: These tools make moving heavy items easier, especially if you’re handling this step on your own.
- Professional Movers: For particularly large or delicate pieces, hiring professionals can save time and effort.
Step 3: Protect the Items That Can’t Be Moved
In some cases, certain items may be too large or permanent to relocate, such as built-in shelves or kitchen islands. Protect these by:
- Covering them with heavy-duty plastic or moving blankets.
- Securing edges with painter’s tape to prevent dust infiltration.
- Marking their presence clearly so contractors know to work around them with care.
Step 4: Plan for Temporary Storage
Decluttering isn’t just about clearing the installation area—it’s also about deciding where your belongings will go in the meantime. A few considerations:
- Will furniture from multiple rooms be moved?
- Do you need to rent a storage unit if your garage or other spaces are full?
- Are high-traffic areas, like hallways or stairs, safe places to stack furniture temporarily?
Step 5: Create a Pathway for Easy Access
Don’t forget to declutter beyond the room being worked on! Contractors will need clear pathways to transport materials and tools in and out of your home. Remove shoes, bags, and other obstacles from entryways, hallways, and stairs.
Avoid Common Decluttering Mistakes
Even with the best intentions, some homeowners overlook these key decluttering tasks:
- Leaving fragile items nearby: Always move breakables to a safe room, as vibrations from the installation can cause accidents.
- Forgetting to remove wall hangings: Mirrors, artwork, or shelves should be taken down to prevent damage from accidental bumps.
- Ignoring hidden clutter: Look under beds, inside cabinets, or behind furniture for items that might need attention.
A Decluttering Checklist to Simplify the Process
Here’s a quick checklist to help you stay organized:
- Remove all small, fragile items.
- Clear the room of furniture and decor.
- Protect any large or immovable fixtures.
- Plan temporary storage for items.
- Create a clear pathway for contractors.
Ensuring Subfloor Preparation and Condition
Step 1: Identify Your Subfloor Type
Different subfloor materials have different preparation requirements:
- Concrete: Common in basements and ground-level rooms, concrete must be clean, dry, and level before installation.
- Plywood or OSB (Oriented Strand Board): Typically used in homes with wood framing, plywood should be free of damage and securely fastened.
Step 2: Check for Damage
Inspect your subfloor for signs of damage before installation day:
- Warping: Look for areas that are raised or bowed, which may indicate moisture issues.
- Squeaking: This is often caused by loose subfloor panels rubbing against each other.
- Cracks: Small cracks can be filled, but larger ones may require professional attention.
Step 3: Ensure the Subfloor is Level
Uneven subfloors can lead to a host of issues, including gaps and creaking noises. To check for leveling issues, use a long straightedge or level:
- Place the straightedge across different areas of the floor.
- Look for any gaps between the straightedge and the floor surface.
- Mark any uneven spots that need attention.
Step 4: Address Moisture Concerns
Moisture is one of the leading causes of flooring damage. If your subfloor is too wet, it can cause swelling and warping over time. Here’s how to test for moisture:
- Concrete Subfloors: Use a moisture meter or tape a square of plastic to the floor for 24 hours. If condensation forms under the plastic, the subfloor needs to dry out.
- Wood Subfloors: Moisture content should be below 12% before installation.
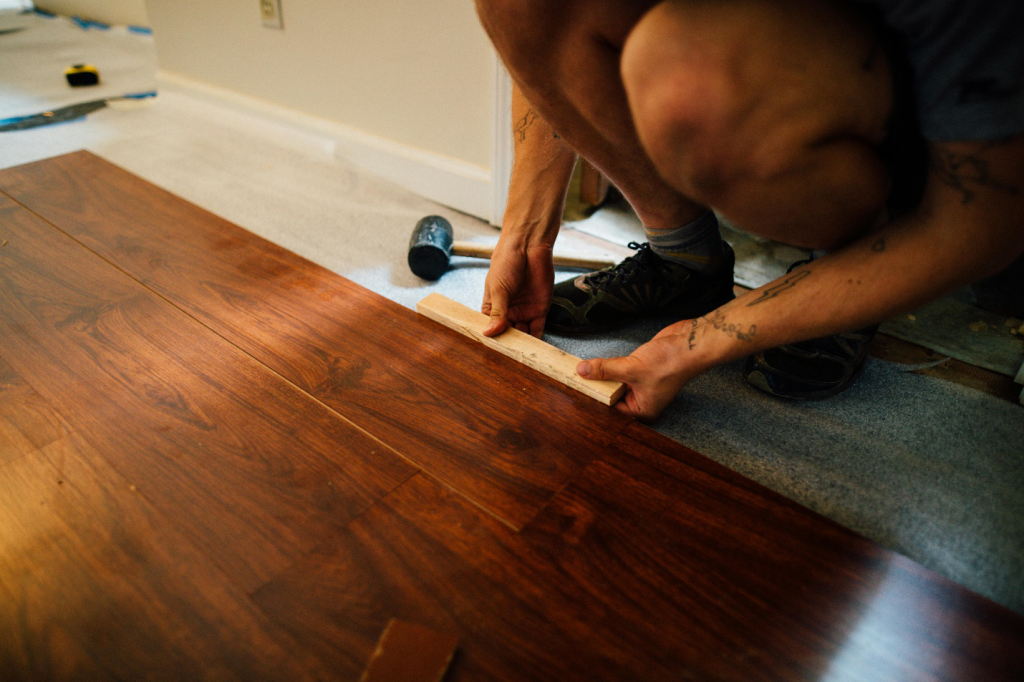
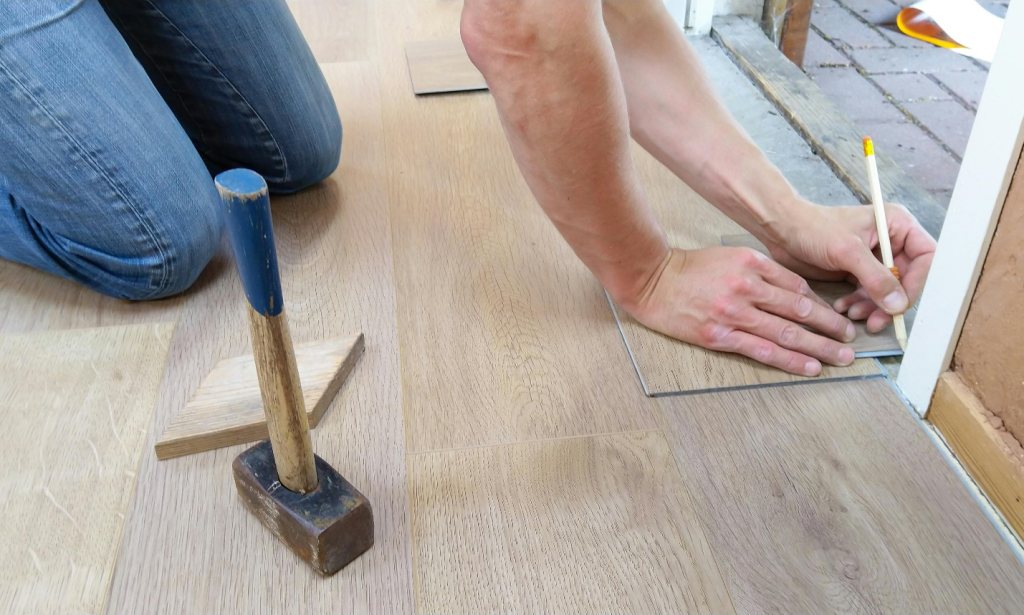
Step 5: Clean and Secure the Subfloor
Ensure your subfloor is free of dust, debris, and adhesive residue from previous flooring. Sweep and vacuum thoroughly to prevent small particles from interfering with the new flooring’s adhesion.
Also, check that all nails or screws are flush with the surface. If any fasteners are sticking up, hammer or tighten them to avoid bumps under the new floor.
Step 6: Consider Underlayment
Depending on the flooring type and subfloor condition, an underlayment may be necessary. Underlayment can:
- Provide a moisture barrier for laminate or vinyl flooring.
- Offer soundproofing, especially in multi-level homes.
- Add extra cushioning for comfort underfoot.
Protecting Adjacent Rooms and Walls
Step 1: Seal Off the Installation Area
One of the simplest ways to protect adjacent rooms is by creating a barrier between the work area and the rest of your home:
- Plastic Sheeting: Use heavy-duty plastic to cover doorways and openings. Secure it with painter’s tape or zippered dust barriers for easy access.
- Temporary Door Covers: Zippered plastic barriers offer easy, resealable access while keeping dust contained.
Step 2: Protect Walls, Baseboards, and Trim
Walls and trim are vulnerable to scuffs and accidental bumps during installation. Here’s how to protect them:
- Corner Guards: Install plastic or cardboard corner guards on high-traffic areas to shield edges from impact.
- Painter’s Tape: Apply tape along baseboards and door frames to prevent scratches or paint chips.
- Furniture Pads: If large furniture is being moved around, use furniture sliders or pads to minimize wall contact.
Step 3: Cover Floors in Adjacent Rooms
If contractors need to walk through other rooms to access the installation area, protect those floors, too:
- Drop Cloths or Runners: Lay down drop cloths or adhesive carpet film to protect carpeting, tile, or hardwood from dirt and scratches.
- Shoe Covers: Request that contractors use disposable shoe covers when entering other parts of your home.
Step 4: Protect Doorways and Hallways
Doorways, hallways, and narrow pathways often take a beating during flooring installation. To minimize damage:
- Foam Edge Guards: These can be placed around door frames to cushion them from impact.
- Door Stops: Use door stops to keep doors from accidentally swinging into contractors or materials.
Step 5: Minimize Dust Spread
Dust control is a major concern during flooring installation. Here are a few ways to reduce dust spread:
- Dust-Generating Tools: Ask your contractor if they use dustless sanders or cutting tools with built-in vacuum attachments.
- Air Purifiers: Running an air purifier in adjacent rooms can help capture airborne particles before they settle.
- Wet Wipes or Dust Cloths: Keep damp cloths on hand to wipe down surfaces periodically, preventing dust from accumulating.
Step 6: Cover Furniture in Adjacent Rooms
If moving all furniture out of adjacent rooms isn’t an option, cover it with heavy-duty plastic or old sheets to protect it from dust and debris. This simple step can save you hours of cleaning once the installation is done.
Preparing Your Household for Disruption
Step 1: Set Realistic Expectations
Start by understanding how long the project will take. Ask your contractor for a detailed timeline and clarify which rooms will be off-limits during each phase of the installation. Share this timeline with everyone in your household so everyone knows what to expect.
Step 2: Create a Temporary Living Plan
If the installation will take place in multiple rooms or critical areas, consider setting up temporary spaces to maintain functionality:
- Kitchen: If your kitchen is being worked on, set up a mini food prep station with a microwave, toaster oven, or portable stove. Stock up on disposable plates and utensils to minimize cleanup.
- Bedrooms: If bedrooms will be off-limits, consider sleeping arrangements in other parts of the house or even staying with friends or family.
- Living Areas: Designate one room as a “safe zone” that’s unaffected by the work. This space can be a retreat for relaxation during the noise and chaos.
Step 3: Communicate with Family Members
Clear communication is essential for a smooth experience:
- Children: Explain what’s happening and why certain areas will be off-limits. Emphasize the importance of staying out of the work zone for safety reasons.
- Elderly Household Members: Ensure older family members are aware of the project timeline and any temporary arrangements. Consider providing them with noise-canceling headphones or earplugs if the noise will be disruptive.
- Roommates: Coordinate schedules and make sure everyone agrees on any temporary living adjustments.
Step 4: Plan for Pets
Pets are especially sensitive to noise and disruption, and flooring installation can be stressful for them. Here’s how to keep them safe and comfortable:
- Create a Safe Space: Set up a quiet room or area where your pet can stay during the installation. Include their bed, food, water, and toys to help them feel secure.
- Secure Pet Gates: If you can’t fully isolate your pet, use gates or crates to keep them away from the work area.
- Consider Boarding: For particularly anxious pets or larger projects, boarding your pet for a day or two might be the best option.
Step 5: Prepare for Noise and Dust
Noise is an inevitable part of flooring installation. From hammering and sawing to sanding and vacuuming, it can be loud. Here’s how to prepare:
- Noise-Canceling Headphones: Invest in a good pair of noise-canceling headphones or earplugs for household members who need quiet.
- White Noise Machines: Use white noise machines or fans to drown out construction sounds in unaffected rooms.
- Daily Cleaning Routine: Dust can spread easily, even with barriers in place. Wipe down surfaces daily and vacuum common areas to keep dust under control.
Step 6: Consider Alternative Arrangements
For larger or more disruptive projects, it may be worth staying elsewhere for a night or two, especially if multiple rooms or high-traffic areas are being worked on. Here are a few options:
- Friends or Family: Ask if you can stay with a loved one for a few nights.
- Short-Term Rentals: If staying away from home is more convenient, consider booking a nearby hotel or rental for the duration of the project.
Step 7: Stay Flexible
No matter how much planning you do, unexpected issues can arise. Materials may be delayed, weather may interfere, or contractors may need extra time to address subfloor issues. Approach the project with a flexible mindset to reduce frustration and keep stress levels low.
Ready for Your Flooring Transformation?
Preparing your home for flooring installation is just the first step to a beautiful and lasting space. At Floorcraft, we specialize in providing high-quality hardwood flooring solutions, vinyl plank flooring, and residential carpet installation to meet your unique needs. Whether you’re upgrading your home or tackling a commercial project, our local hardwood flooring installers and carpet installation experts will ensure a seamless, stress-free installation process.